
34 posts tagged with "KCL"

View All Tags

· 6 min read

Introduction

In K8S, there is a design pattern called Sidecar, The Sidecar pattern deploys application components into a separate process or container to provide isolation and encapsulation. And it also allows applications to be composed of heterogeneous components and technologies.

This pattern is named Sidecar because it resembles a Sidecar attached to a motorcycle. The Sidecar connects to a parent application and provides support functions for the application. The Sidecar also shares the same lifecycle as the parent application, being created and retired alongside the parent. The Sidecar pattern is sometimes referred to as the sidepick pattern and is a decomposition pattern.

This series of articles will show the usage of the Sidecar pattern and how to use the Sidecar pattern by KCL.

A Cloud-Native Minimalist Web Services

At first, we could start a web service in our kubernetes environment. Define a pod with only one Nginx service and start a web service on port 80 in the pod.yaml file below.

apiVersion: v1
kind: Pod
metadata:
name: web-app
spec:
containers:
- image: nginx
name: main-container
ports:
- containerPort: 80

Pod is a foundational primitive in cloud native. Pod wraps multiple containers into a single logical unit, and the kubernetes runtime ensures that the containers in a Pod run on a single machine. So all containers in a Pod share lifecycles, disk volumes, network, etc. The Sidecar pattern is about adding other containers to a Pod to extend and augment the capabilities of the main container.

The Pod is then created via the kubectl, and then the Pod execution status is viewed via kubectl get po.

$ kubectl create -f pod.yaml
$ kubectl get po
NAME READY STATUS RESTARTS AGE
web-app 1/1 Running 0 45m

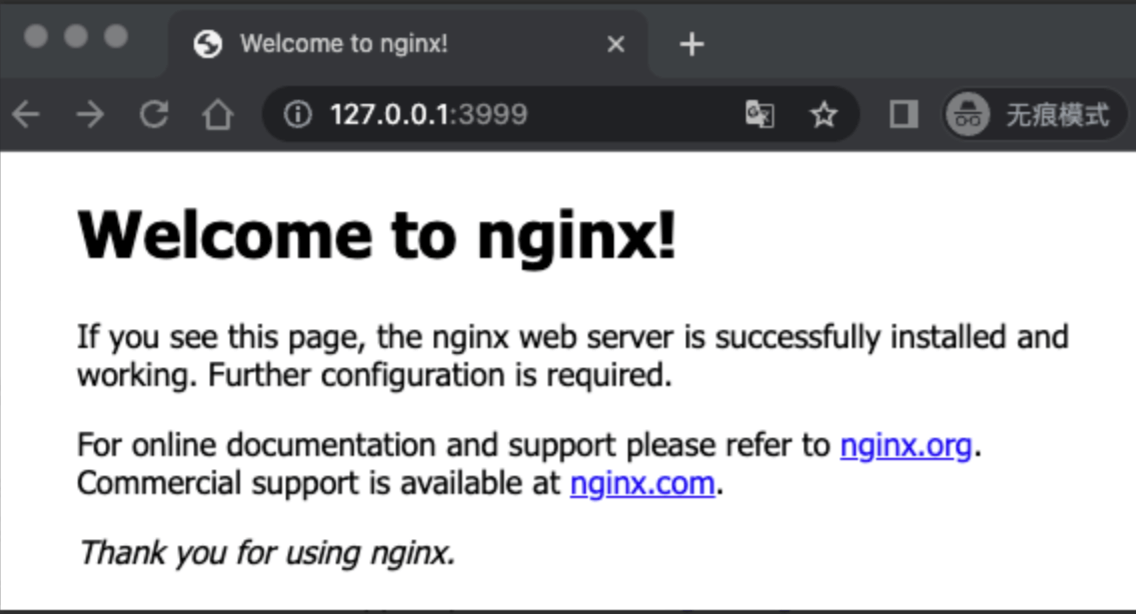
You can see that a Pod named web-app is up and running properly, containing the Nginx service. To configure port forwarding for external access, the port 3999 of the host corresponds to port 80 of the master container:

$ kubectl port-forward web-app 3999:80
Forwarding from 127.0.0.1:3999 ->80
Forwarding from [::1]:3999 -> 80

Port forwarding is a blocking procedure, keep the command line open. Then open the test page in your browser at

Expand the page content by Sidecar

In this section, we try to add the ability to customize web pages to the Nginx service via Sidecar without modifying the original Nginx container image. Before we start, remove the previously started Pod:

$ kubectl delete po web-app
pod "web-app" deleted

Then add a second Busybox Sidecar container to the Pod, with the pod.yaml file as follows:

apiVersion: v1
kind: Pod
metadata:
name: web-app
spec:
containers:
- image: nginx
name: main-container
ports:
- containerPort: 80

# --- Here are the new additions ---

# andSidecar share file directories to be published via disk volumes
volumeMounts:
- name: var-logs
mountPath: /usr/share/nginx/html

# Sidecar Container
- image: busybox
command: ["/bin/sh"]
args: ["-c", "while true; do echo $(date -u) 'Hi I am from Sidecar container' > /var/log/index.html; sleep 5;done"]
name: Sidecar-container
volumeMounts: var-logs
mountPath: /var/log

# All containers in Pod share disk volumes
volumes:
- name: var-logs
emptyDir: {}

The commands executed by the Busybox Sidecar container correspond to the following shell scripts:

while true; do
echo $(date -u) 'Hi I am from Sidecar container' > /var/log/index.html;
sleep 5;
done

The Busybox has only one function: it overwrites the /var/log/index.html file every 5 seconds, which happens to correspond to the home page file of the Nginx service.

Then restart the Pod and remap the local host port to the container port.

$ kubectl create -f pod.yaml 
pod/web-app created
$ kubectl port-forward web-app 3999:80
Forwarding from 127.0.0.1:3999 -> 80
Forwarding from [::1]:3999 -> 80

Upon reopening your browser you will see the following page:

How Sidecar mode works

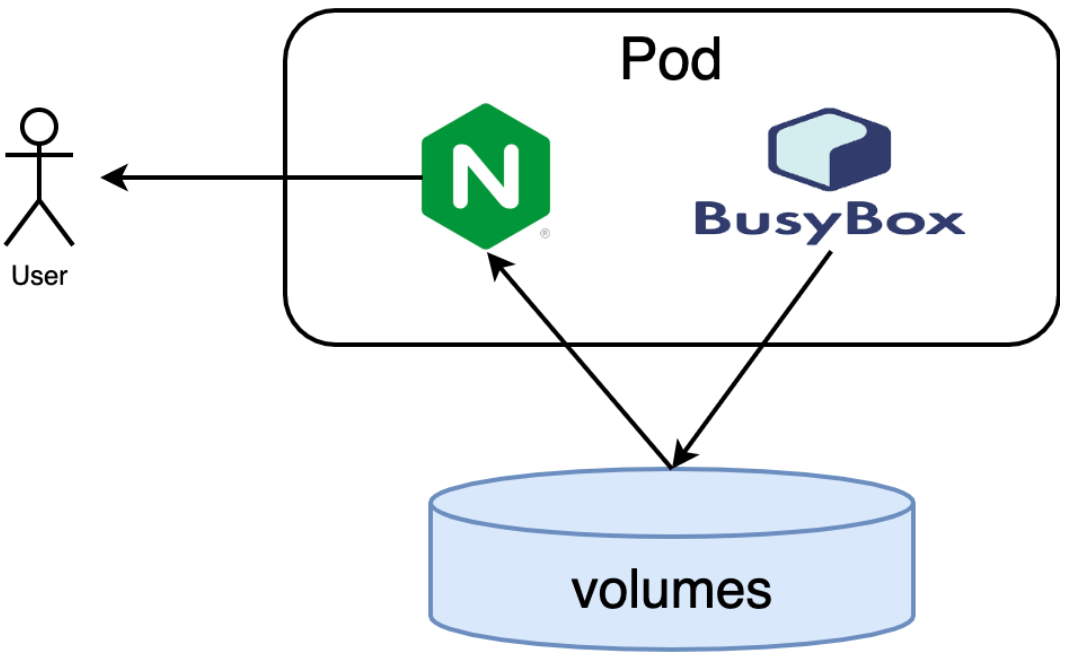
Busybox is a Sidecar container that produces the home page data, while Nginx is the main container that consumes the home page data produced by Busybox; the two containers share space through the var-logs disk volume.

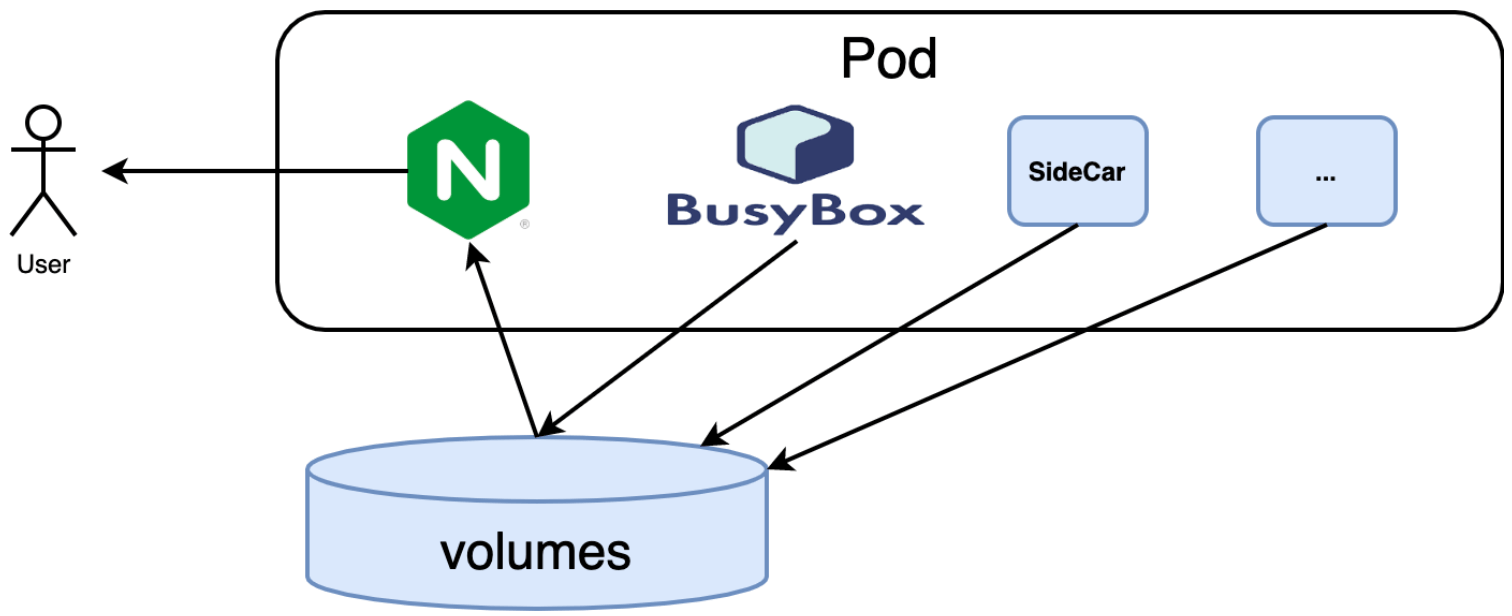
In the example, Nginx is still the main container, and the Sidecar container is BusyBox. we can also add more Sidecar containers for network, monitoring, logging, etc.

Advantages of Sidecar

Containers have now become a popular packaging technology, where various teams can build, publish and run programs in a unified way, and even manage various resources through containers. So a container is more like a product with its own runtime, release cycle, documentation, API, etc. A good container/product is responsible for solving only one problem, and maintaining the KISS principle allows the container itself to be extremely reusable and replaceable.

It is reusability that makes the modern build process more agile and efficient. But reusable containers are generally single-function, and we often need to extend the functionality of containers, as well as the need for more collaboration between containers.

The Sidecar can be added lots of trailers without modifying the main motorcycle, and accordingly the Sidecar pattern can extend and enhance the existing main container functions without modifying the main container.

There is a rule in object-oriented programming that "combination is better than inheritance, use more combination and less inheritance", so Sidecar is also a recommended pattern to use. Because of the advantages of the Sidecar pattern, it has recently been used in a lot of cloud-native scenarios. For example, it can be used to encrypt communication between Pods through a service mesh or to act as a database proxy. Sidecar containers can be used for log forwarding (e.g., fluentd), Service Mesh (e.g., Istio, Linkerd), proxying (e.g., Docker Ambassador), health checking (to check if certain components are working properly), and other auxiliary tasks (such as copying files or downloading files).

Summary

In this article, we briefly introduce and demonstrate the Sidecar pattern, while comparing the relationship between Sidecar pattern and the combinatorial programming pattern in the context of traditional object-oriented programming ideas. the advantages of the Sidecar pattern are not only in the harmless enhancement of the main container, but also in the more flexible ability to dynamically adjust the main container capability.

In later articles, we will try to simplify writing Sidecar configurations by modern cloud-native configuration languages such as KCL. Extending existing configuration based on Sidecar by dynamically injecting and modifying it through KCL.

· 9 min read

Introduction

Helm is a tool for generating deployable manifests for Kubernetes objects, which philosophically takes the task of generating the final manifests in two distinct forms. Helm is an imperative templating tool for managing Kubernetes packages called charts. Charts are a templated version of your yaml manifests with a subset of Go Templating mixed throughout, as well it is a package manager for kubernetes that can package, configure, and deploy/apply the helm charts onto kubernetes clusters.

In KCL, the user can directly write the configuration instead of template files with more tools and IDE plugin support that needs to be modified in the corresponding code in the corresponding place, eliminating the cost of reading basic YAML. At the same time, the user can reuse the configuration fragments by code, avoiding massive copying and pasting of YAML configuration. The information density is higher, and it is not easy to make mistakes through KCL.

A classic example of helm chart configuration management is used to explain the differences between Helm and KCL in Kubernetes resource configuration management.

Helm

Helm has the concepts of values.yaml and template. In general, the Helm chart project is generally a directory including a Chart.yaml.:

We can execute the following command line to obtain a typical Helm Chart project.

  • Create a directory named workload-helm to hold the chart project
# Create a directory to hold the chart project
mkdir workload-helm
# Create a workload-helm/Chart.yaml
cat <<EOF > workload-helm/Chart.yaml
apiVersion: v2
appVersion: 0.3.0
description: A helm chart to provision standard workloads.
name: workload
type: application
version: 0.3.0
EOF
# Create a workload-helm/values.yaml
cat <<EOF > workload-helm/values.yaml
service:
type: ClusterIP
ports:
- name: www
protocol: TCP
port: 80
targetPort: 80

containers:
my-container:
image:
name: busybox:latest
command: ["/bin/echo"]
args:
- "-c"
- "Hello World!"
resources:
limits:
cpu: 100m
memory: 128Mi
requests:
cpu: 100m
memory: 128Mi
EOF
  • Create a directory to hold templates
# Create a directory to hold templates
mkdir workload-helm/templates
# Create a workload-helm/templates/helpers.tpl
cat <<EOF > workload-helm/templates/helpers.tpl
{{/*
Expand the name of the chart.
*/}}
{{- define "workload.name" -}}
{{- default .Release.Name .Values.nameOverride | trunc 63 | trimSuffix "-" }}
{{- end }}
{{/*
Create a default fully qualified app name.
We truncate at 63 chars because some Kubernetes name fields are limited to this (by the DNS naming spec).
If release name contains chart name it will be used as a full name.
*/}}
{{- define "workload.fullname" -}}
{{- \$name := default .Chart.Name .Values.nameOverride }}
{{- if contains \$name .Release.Name }}
{{- .Release.Name | trunc 63 | trimSuffix "-" }}
{{- else }}
{{- printf "%s-%s" .Release.Name \$name | trunc 63 | trimSuffix "-" }}
{{- end }}
{{- end }}
{{/*
Create chart name and version as used by the chart label.
*/}}
{{- define "workload.chart" -}}
{{- printf "%s-%s" .Chart.Name .Chart.Version | replace "+" "_" | trunc 63 | trimSuffix "-" }}
{{- end }}
{{/*
Common labels
*/}}
{{- define "workload.labels" -}}
helm.sh/chart: {{ include "workload.chart" . }}
{{ include "workload.selectorLabels" . }}
{{- if .Chart.AppVersion }}
app.kubernetes.io/version: {{ .Chart.AppVersion | quote }}
{{- end }}
app.kubernetes.io/managed-by: {{ .Release.Service }}
{{- end }}
{{/*
Selector labels
*/}}
{{- define "workload.selectorLabels" -}}
app.kubernetes.io/name: {{ include "workload.name" . }}
app.kubernetes.io/instance: {{ .Release.Name }}
{{- end }}
EOF
cat <<EOF > workload-helm/templates/deployment.yaml
apiVersion: apps/v1
kind: Deployment
metadata:
name: {{ include "workload.name" . }}
labels:
{{- include "workload.labels" . | nindent 4 }}
spec:
selector:
matchLabels:
{{- include "workload.selectorLabels" . | nindent 6 }}
template:
metadata:
labels:
{{- include "workload.selectorLabels" . | nindent 8 }}
spec:
containers:
{{- range \$name, \$container := .Values.containers }}
- name: {{ \$name }}
image: "{{ $container.image.name }}"
{{- with \$container.command }}
command:
{{- toYaml \$container.command | nindent 12 }}
{{- end }}
{{- with \$container.args }}
args:
{{- toYaml \$container.args | nindent 12 }}
{{- end }}
{{- with \$container.env }}
env:
{{- toYaml \$container.env | nindent 12 }}
{{- end }}
{{- with \$container.volumeMounts }}
volumeMounts:
{{- toYaml \$container.volumeMounts | nindent 12 }}
{{- end }}
{{- with \$container.livenessProbe }}
livenessProbe:
{{- toYaml \$container.livenessProbe | nindent 12 }}
{{- end }}
{{- with \$container.readinessProbe }}
readinessProbe:
{{- toYaml \$container.readinessProbe | nindent 12 }}
{{- end }}
{{- with \$container.resources }}
resources:
{{- toYaml \$container.resources | nindent 12 }}
{{- end }}
{{- end }}
EOF
cat <<EOF > workload-helm/templates/service.yaml
{{ if .Values.service }}
apiVersion: v1
kind: Service
metadata:
name: {{ include "workload.name" . }}
labels:
{{- include "workload.labels" . | nindent 4 }}
spec:
type: {{ .Values.service.type }}
selector:
{{- include "workload.selectorLabels" . | nindent 4 }}
{{- with .Values.service.ports }}
ports:
{{- toYaml . | nindent 4 }}
{{- end }}
{{- end }}
EOF

Thus, we can get a basic Helm chart directory

.
├── Chart.yaml
├── templates
│ ├── _helpers.tpl
│ ├── deployment.yaml
│ └── service.yaml
└── values.yaml

We can display the real deployment configuration of through the following command.

helm template workload-helm

The output YAML is

---
# Source: workload-helm/templates/service.yaml
apiVersion: v1
kind: Service
metadata:
name: release-name
labels:
helm.sh/chart: workload-0.3.0
app.kubernetes.io/name: release-name
app.kubernetes.io/instance: release-name
app.kubernetes.io/version: "0.3.0"
app.kubernetes.io/managed-by: Helm
spec:
type: ClusterIP
selector:
app.kubernetes.io/name: release-name
app.kubernetes.io/instance: release-name
ports:
- name: www
port: 80
protocol: TCP
targetPort: 80
---
# Source: workload-helm/templates/deployment.yaml
apiVersion: apps/v1
kind: Deployment
metadata:
name: release-name
labels:
helm.sh/chart: workload-0.3.0
app.kubernetes.io/name: release-name
app.kubernetes.io/instance: release-name
app.kubernetes.io/version: "0.3.0"
app.kubernetes.io/managed-by: Helm
spec:
selector:
matchLabels:
app.kubernetes.io/name: release-name
app.kubernetes.io/instance: release-name
template:
metadata:
labels:
app.kubernetes.io/name: release-name
app.kubernetes.io/instance: release-name
spec:
containers:
- name: my-container
image: "busybox:latest"
command:
- /bin/echo
args:
- -c
- Hello World!
resources:
limits:
cpu: 100m
memory: 128Mi
requests:
cpu: 100m
memory: 128Mi

KCL

In KCL, we provide the ability similar to Helm values.yaml to configure dynamic parameters through configuration files kcl.yaml.

We can execute the following command line to obtain a typical KCL project with the kcl.yaml.

  • Create a directory named workload-kcl to hold the KCL project
# Create a directory to hold the KCL project
mkdir workload-kcl
# Create a workload-kcl/kcl.yaml
cat <<EOF > workload-kcl/kcl.yaml
kcl_options:
- key: containers
value:
my-container:
image:
name: busybox:latest
command: ["/bin/echo"]
args:
- "-c"
- "Hello World!"
resources:
limits:
cpu: 100m
memory: 128Mi
requests:
cpu: 100m
memory: 128Mi

- key: service
value:
type: ClusterIP
ports:
- name: www
protocol: TCP
port: 80
targetPort: 80
EOF
  • Create KCL files to hold kubernetes resources.
# Create a workload-kcl/deployment.k
cat <<EOF > workload-kcl/deployment.k
apiVersion = "apps/v1"
kind = "Deployment"
metadata = {
name = "release-name"
labels = {
"app.kubernetes.io/name" = "release-name"
"app.kubernetes.io/instance" = "release-name"
}
}
spec = {
selector.matchLabels = metadata.labels
template.metadata.labels = metadata.labels
template.spec.containers = [
{
name = name
image = container.image.name
command = container.command
command = container.args
env = container.env
resources = container.resources
} for name, container in option("containers") or {}
]
}
EOF
cat <<EOF > workload-kcl/service.k
apiVersion = "v1"
kind = "Service"
metadata = {
name = "release-name"
labels = {
"app.kubernetes.io/name" = "release-name"
"app.kubernetes.io/instance" = "release-name"
}
}
spec = {
selector.matchLabels = metadata.labels
type = option("service", default={})?.type
ports = option("service", default={})?.ports
}
EOF

In the above KCL code, we declare the apiVersion, kind, metadata, spec and other attributes of Kubernetes Deployment and Service resources, and assign the corresponding contents respectively. In particular, we assign metadata.labels to spec.selector.matchLabels and spec.template.metadata.labels. It can be seen that the data structure defined by KCL is more compact than Helm template or YAML, and configuration reuse can be realized by defining local variables.

In KCL, we can dynamically receive external parameters through conditional statements and the option builtin function, and set different configuration values to generate resources.

We can get the Deployment and Service resources throw the following command:

  • Deployment
kcl workload-kcl/deployment.k -Y workload-kcl/kcl.yaml

The output is

apiVersion: apps/v1
kind: Deployment
metadata:
name: release-name
labels:
app.kubernetes.io/name: release-name
app.kubernetes.io/instance: release-name
spec:
selector:
matchLabels:
app.kubernetes.io/name: release-name
app.kubernetes.io/instance: release-name
template:
metadata:
labels:
app.kubernetes.io/name: release-name
app.kubernetes.io/instance: release-name
spec:
containers:
- name: my-container
image: busybox:latest
command:
- -c
- Hello World!
resources:
limits:
cpu: 100m
memory: 128Mi
requests:
cpu: 100m
memory: 128Mi
  • Service
kcl workload-kcl/service.k -Y workload-kcl/kcl.yaml

The output is

apiVersion: v1
kind: Service
metadata:
name: release-name
labels:
app.kubernetes.io/name: release-name
app.kubernetes.io/instance: release-name
spec:
selector:
matchLabels:
app.kubernetes.io/name: release-name
app.kubernetes.io/instance: release-name
type: ClusterIP
ports:
- name: www
protocol: TCP
port: 80
targetPort: 80

In addition, we can overwrite the value in the kcl.yaml file with the -D parameter, such as executing the following command.

kcl workload-kcl/service.k -Y workload-kcl/kcl.yaml -D service=None

The output is

apiVersion: v1
kind: Service
metadata:
name: release-name
labels:
app.kubernetes.io/name: release-name
app.kubernetes.io/instance: release-name
spec:
selector:
matchLabels:
app.kubernetes.io/name: release-name
app.kubernetes.io/instance: release-name
type: null
ports: null

Summary

It can be seen that, compared with Helm, KCL reduces the number of configuration files and code lines by means of code generation on the basis of configuration reuse and coverage, And like Helm, it is a pure client solution, which can move the configuration and policy verification to the left as far as possible without additional dependency or burden on the cluster, or even without a real Kubernetes cluster.

Helm can define reusable templates in the .tpl file and support other templates to reference it. However, only defined templates can be reused. In a complex Helm chart project, we need to define a lot of additional basic templates. Compared with the cumbersome writing method of Helm, all contents in KCL are variables. No additional syntax is required to specify templates. Any variables can be referenced to each other.

In addition, there are a large number of {{- include }}, nindent and toYaml tag characters that have nothing to do with actual logic in Helm. You need to calculate spaces and indents at each reference. In KCL, there are fewer useless codes, and there is no need for too many {{*}} to mark code blocks. The information density is higher, and the indentation and space have been completely liberated.

In fact, KCL and Helm are not antagonistic. We can even use KCL to write HelmRelease templates and provide programmable extension capabilities for existing Helm chart to write YAML validators.

Future Plan

We also expect that KCL models and constraints can be managed as a package (this package has only KCL files). For example, the Kubernetes models and constraints can be used out of the box. Users can generate configurations or verify existing configurations, and can simply extend the models and constraints users want through KCL inheritance.

At this stage, you can use tools such as Git or OCI Registry As Storage (ORAS) to manage KCL configuration versions.

More Documents